
CentOS6.9部署Python3+Flask+uWSGI+Nginx

最近在业余时间去学习python web开发, 并用Flask做了一个BLOG小程序放到我的个人仓库和Github仓库, 这里把自己的文档分享给大家, 仅供参考
https://github.com/showerlee/Flaskdev
https://git.showerlee.com/showerlee/Flaskdev
安装环境
OS(virtualbox): CentOS 6.9 x64 (flask.example.com)
OS(localhost): Windows 7 x64
Python: Python3.4/Python2.6.6
Flask: Flask 0.12.x
nWSGI: uwsgi-2.0.15
Nginx: nginx- 1.10.2-1.el6
一. 系统环境配置
1.关闭iptables和selinux
# su - root
# service iptables stop
# setenforce 0
# vi /etc/sysconfig/selinux
修改
SELINUX=disabled
2.添加本地host DNS
# vi /etc/hosts
127.0.0.1 flask.example.com
二. Python配置
1.安装python3.4源及依赖包
# yum install epel-release -y
# yum groupinstall "Development tools" -y
# yum install zlib-devel bzip2-devel openssl-devel ncurses-devel zx-devel sqlite-devel readline-devel tk-devel gdbm-devel db4-devel libpcap-devel -y
2.编译安装python3.4以及pip package manager
# wget https://www.python.org/ftp/python/3.4.3/Python-3.4.3.tar.xz --no-check-certificate
# tar xf Python-3.4.3.tar.xz
# cd Python-3.4.3
# ./configure --prefix=/usr/local --with-ensurepip=install
# make && make install
3.安装virtualenv
# pip install --upgrade pip
# pip install virtualenv
三. Nginx配置
1. 安装nginx package
# yum install nginx -y
2.配置nginx with nWSGI
# vi /etc/nginx/conf.d/flask.conf
server {
    listen	 80;
    server_name  flask.example.com;

    charset utf-8;

    access_log  /var/log/nginx/flask_access.log  main;
    error_log   /var/log/nginx/flask_error.log;


    location / {
        try_files $uri @yourapplication;
        client_max_body_size 32M;
    }
    location @yourapplication {
        include uwsgi_params;
        uwsgi_pass unix:/tmp/uwsgi.sock;
        uwsgi_read_timeout 30s;
        uwsgi_send_timeout 30s;
    }
}
四. Flask+uWSGI配置
1. uWSGI配置
# mkdir -p /etc/uwsgi
# vi /etc/uwsgi/uwsgi.ini
[uwsgi]
base = /usr/share/nginx/html/flask

python-path = %(base)
app = hello
module = %(app)
callable = app

pidfile = /tmp/uwsgi-master.pid
touch-reload = /etc/uwsgi/bin/reload

master = true
processes = 5
enable-threads = true

limit-as = 512

# use unix socket because it is more secure and faster than TCP socket
socket = /tmp/uwsgi.sock
chmod-socket = 660
uid = nginx
gid = nginx

vacuum = true
die-on-term = true
emperor = true

logto = /var/log/nginx/uwsgi.log
2. 配置Flask base folder
# cd /usr/share/nginx/html
# mkdir flask
# cd flask
# virtualenv -p /usr/local/bin/python3 .py3env
3. 开启virtualenv python3环境
# source .py3env/bin/activate
4. 在此环境安装Flask相关模块
# pip install flask uwsgi PyMySQL flask-wtf passlib
5. 写入Flask测试文件
# vi hello.py
from flask import Flask
app = Flask(__name__)

@app.route("/")
def hello():
    return "Hello World!"

if __name__ == "__main__":
    app.run()
6. 创建uWSGI启动脚本
# mkdir -p /etc/uwsgi/bin
# vi /etc/uwsgi/bin/uwsgi.sh
#!/bin/bash

# Get function from functions library
. /etc/init.d/functions

BASE=/usr/share/nginx/html/flask
UWSGI=$BASE/.py3env/bin
INI=/etc/uwsgi

start() {
  echo -n "Starting server ..."
  touch $INI/bin/reload
  $UWSGI/uwsgi --ini $INI/uwsgi.ini >/dev/null 2>&1 &
  success $"Started"
  echo
}

reload() {
  $UWSGI/uwsgi --reload /tmp/uwsgi-master.pid
  success $ "Reloaded"
  echo
}

stop() {
  echo -n "Stopping server ..."
  $UWSGI/uwsgi --stop /tmp/uwsgi-master.pid
  success $ "Stopped"
  echo
}

### main logic ###
case "$1" in
  start)
    start
    ;;
  stop)
    stop
    ;;
  reload)
    reload
    ;;
  restart)
    stop
    start
    ;;
  *)
    echo $"Usage: $0 {start|stop|restart|reload}"
    exit 1

esac
exit 0
7. 修改权限(可执行并保持与nginx启动user一致)
# chmod -R 755 /etc/uwsgi
# chown -R nginx:nginx /etc/uwsgi
# chmod -R 755 /usr/share/nginx/html/flask
# chown -R nginx:nginx /usr/share/nginx/html/flask
8.启动nginx+uwsgi
# service nginx start
# /etc/uwsgi/bin/uwsgi.sh start
展示效果(保证Windows本地host文件能够解析flask.example.com)
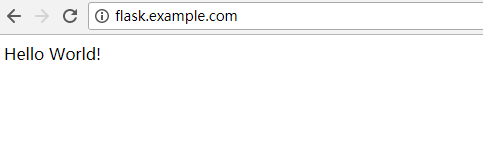
Finished...
Trouble shooting:
1.查看uwsgi log, 发现循环输出如下warning.
# tail -f /var/log/nginx/uwsgi.log
chdir(): Permission denied [core/emperor.c line 1499]
chdir(): Permission denied [core/emperor.c line 1499]
chdir(): Permission denied [core/emperor.c line 1499]
chdir(): Permission denied [core/emperor.c line 1499]
...
Solution:
# cd /usr/share/nginx/html
# source .py3env/bin/activate
# python hellp.py
 * Running on http://127.0.0.1:5000/ (Press CTRL+C to quit)
 * Restarting with stat
 * Debugger is active!
 * Debugger PIN: 126-450-249
若无报错提示并显示如上输出, ctrl+C 强制退出. 并重启服务, 该warning即停止.
Tip: 该方法亦可测试你的主方法文件是否有语法格式错误.
# /etc/uwsgi/bin/uwsgi.sh start
该错误会偶尔在开发过程中添加新方法后出现, 暂不清楚原因, 有经验的朋友可以留言.
My Flask APP for the reference:
https://git.showerlee.com/showerlee/Flaskdev
本文链接:http://www.showerlee.com/archives/2024


还没有评论,快来抢沙发!