
Mac+Docker+Ansible部署WordPress Application
很久没有更新了,今天给大家在这里推荐使用Docker部署Wordpress Application
Docker就不多介绍了,大家可以理解为是他是一个虚拟集装箱,将原来以服务器为基础单元的集群,细化到以每个服务进程为单元。这样的优点在于:
1. 隔离开发环境和具体可执行进程,可跨平台跨主机使用,统一开发环境
2. 节约时间成本,硬件成本,秒级别快速部署启动
3. 支持持续集成,可利用相关部署工具(Ansible, saltstack)进行快速部署
4. 可作为轻量级别主机或节点部署应用
5. 未来可能代替虚拟机的虚拟容器
最后利用Ansible去对Docker容器进行具体服务的部署,最大限度的体现轻量级,统一开发部署环境的好处。
在部署之前首先给大家介绍一下我的部署结构:
dockerfiles
├── mariadb
│ ├── Dockerfile
│ ├── ansible
│ │ ├── mariadb-install-container.yml
│ │ ├── mariadb.sh
│ │ ├── mariadb.sql
│ │ └── my.cnf
│ └── run.sh
├── nginx
│ ├── Dockerfile
│ ├── ansible
│ │ ├── default.conf
│ │ ├── nginx-container.yml
│ │ └── nginx.conf
│ └── run.sh
└── php
├── Dockerfile
├── ansible
│ ├── info.php
│ ├── php-container.yml
│ ├── test-db-conn.php
│ ├── wp-config.php
│ └── http://www.conf
└── run.sh
Dockerfiles主目录下面分别是3个服务所对应的目录,每个目录大致分为Dockerfile配置文件, ansible目录,以及run.sh
Dockerfile这个大家都清楚,用来Build容器镜像的配置脚本。
ansible目录下保存需要在容器内使用到的ansible playbook相应配置文件。
run.sh则是创建和运行容器的启动脚本,我们分别去执行对应目录的执行脚本用来构建Docker容器所对应的服务。
这里给大家提供一个我的gitlab私人仓库的链接,方便大家去下载这个部署脚本:
https://git.showerlee.com/showerlee/ansible-docker-wp
大家如果想对Docker和Ansible有不太明白的地方可以先阅读我之前写的文章。
Docker: http://www.showerlee.com/archives/1758
Ansible: http://www.showerlee.com/archives/1649
一.环境部署
Local system: MAC OS X 10.12.1
Docker: Docker 1.12.3
Tip: 这里说明一下,较早版本的Docker若在非Linux内核下去安装需要去配合安装virtualbox虚拟机才能正常使用,这里我们使用的最新版本Docker配合MAC OS 10.12.1最新开放出来的内核接口,可无需调用额外虚拟机直接安装使用即可。
二.Docker部署
Mariadb container
Mariadb是Mysql在CentOS7上的一个开源分支, 大家可以理解就是一个mysql. 这里首先我们为什么先去部署并启动Mariadb, 是因为我们后面启动Docker时会用到它的一个Link参数,这个参数不仅保证两台容器会安全的利用这个Link去传输数据,而且还会在被Link主机内创建一个host记录,方便我们直接用FQDN名去访问相应主机。
Dockerfile
FROM ansible/centos7-ansible/:stable

ADD ansible /data/ansible

WORKDIR /data/ansible

RUN ansible-playbook mariadb-install-container.yml -c local

# Initialize and start mariadb
RUN chmod +x mariadb.sh

CMD ["./mariadb.sh"]

EXPOSE 3306
这里简单来说就是下载集成Ansible的CentOS7容器镜像,并将ansible playbook及相应配置文件复制到容器内去部署MariaDB初始环境,最终启动服务,并开启3306DB端口.
ansible/mariadb-install-container.yml
- name: Install Mariadb container
  hosts: local
  vars:
    conf_path: /etc/my.cnf
    src_socket: /data/mariadb_data/mysql.sock
    link_socket: /var/lib/mysql/mysql.sock
    user: mysql
  tasks:
  - name: Install epel-release package
    yum: name=epel-release state=latest

  - name: Install required packages
    yum: name={{ item }} state=latest
    with_items:
      - net-tools
      - lsof
      - nmap
      - mariadb-server
      - MySQL-python

  - name: Copy mariadb conf
    copy: src=my.cnf dest={{ conf_path }} mode=0644

  - name: Link mysql socket
    file:
      src={{ src_socket }} dest={{ link_socket }} state=link force=yes
这里是ansible playbook, 基本上就是利用ansible本地安装Epel源以及Mariadb相应的安装包,然后进行DB的相关配置。
ansible/mariadb.sh
#!/bin/sh
 chown -R mysql:mysql /var/lib/mysql

 mysql_install_db --user=mysql --datadir=/data/mariadb_data > /dev/null

 mysqld_safe &

 sleep 5s

 mysql -v < mariadb.sql

 sleep 5s

 ps -wef | grep mysql | grep -v grep | awk '{print $2}' | xargs kill -9

 mysqld_safe --user mysql
这里是对Mariadb进行初始化安装,并使用sql脚本更改root密码及相应权限和创建Wordpress数据库,最终重启DB服务。
ansible/Mariadb.sql
USE mysql;
 GRANT ALL PRIVILEGES ON *.* TO 'root'@'%' WITH GRANT OPTION;
 FLUSH PRIVILEGES;
 UPDATE user SET password=PASSWORD("123456") WHERE user='root';
 FLUSH PRIVILEGES;
 CREATE DATABASE wordpress;
 FLUSH PRIVILEGES;
ansible/my.cnf
[mysqld]
datadir=/data/mariadb_data
socket=/data/mariadb_data/mysql.sock
port=3306
bind-address = 0.0.0.0

# Disabling symbolic-links is recommended to prevent assorted security risks
symbolic-links=0
# Settings user and group are ignored when systemd is used.
# If you need to run mysqld under a different user or group,
# customize your systemd unit file for mariadb according to the
# instructions in http://fedoraproject.org/wiki/Systemd

[mysqld_safe]
log-error=/var/log/mariadb/mariadb.log
pid-file=/var/run/mariadb/mariadb.pid

#
# include all files from the config directory
#
!includedir /etc/my.cnf.d
Mariadb的DB配置.
run.sh
#/bin/bash

IMAGE="leon/mariadb"
Container="mariadb"

docker build -t ${IMAGE} .

docker run -d -p 3306:3306 --name ${Container} ${IMAGE}
最终我们使用docker build去创建一个基于Dockerfile配置的MariaDB容器镜像,并用docker run去启动这个容器镜像。
Tip: -d为后台启动容器,-p为打开端口,--name 为创建容器名,-t为打一个镜像标签。
PHP container
接下来我们会部署启动php-fpm服务,作为解析Wordpress网站的php服务, 它会开启9000端口,方便后面的nginx container去进行反向连接。
Dockerfile
FROM ansible/centos7-ansible:stable

ADD ansible /data/ansible

WORKDIR /data/ansible

RUN ansible-playbook php-container.yml -c local

# Add the volume to php application
VOLUME ["/data/app"]

# CMD ["php-fpm", "--nodaemonize"]
ENTRYPOINT ["/usr/sbin/php-fpm", "-F"]

EXPOSE 9000
这里的配置基本上和MariaDB类似,区别在于我们会在这里去创建一个与nginx共同使用的共享网站目录,里面会保存Wordpress源代码和相关php测试文件。
ansible/php-container.yml
- name: Create PHP container
  hosts: local
  vars:
    app_dir: /data/app
    src_dir: /data/src
    phpfpm_path: /etc/php-fpm.d/www.conf
    info_path: /data/app/info.php
    test_path: /data/app/test-db-conn.php
    wp_url: https://cn.wordpress.org/wordpress-4.5.3-zh_CN.tar.gz
    wp_config: /data/app/wp-config.php
  tasks:
  - name: Install epel-release packages
    yum: name=epel-release state=latest

  - name: Install required packages
    yum: name={{ item }} state=latest
    with_items:
      - net-tools
      - lsof
      - nmap
      - unzip
      - mariadb

  - name: Install php packages
    yum: name={{ item }} state=latest
    with_items:
      - php
      - php-mysql
      - php-fpm
      - php-gd
      - php-mbstring

  - name: Create dir
    file: path={{ item }} state=directory mode=0755
    with_items:
      - "{{ app_dir }}"
      - "{{ src_dir }}"

  - name: Unpack WP package
    unarchive: src={{ wp_url }} dest={{ src_dir }} remote_src=yes

  - name: Move WP source code to app_dir
    shell: "shopt -s dotglob && mv {{ src_dir }}/wordpress/* {{ app_dir }}"

  - name: Copy wp configuration
    copy: src=wp-config.php dest={{ wp_config }}

  - name: Copy php info page
    copy: src=info.php dest={{ info_path }} mode=0755

  - name: Copy test-db-conn page
    copy: src=test-db-conn.php dest={{ test_path }} mode=0755

  - name: Copy nginx configuration
    copy: src=www.conf dest={{ phpfpm_path }} mode=0755
这里playbook配置内容较多,不过基本上就是安装php-fpm以及相应安装包,配置php-fpm配置项,并下载Wordpress源代码并将DB信息写入WP配置文件,复制php测试脚本等。
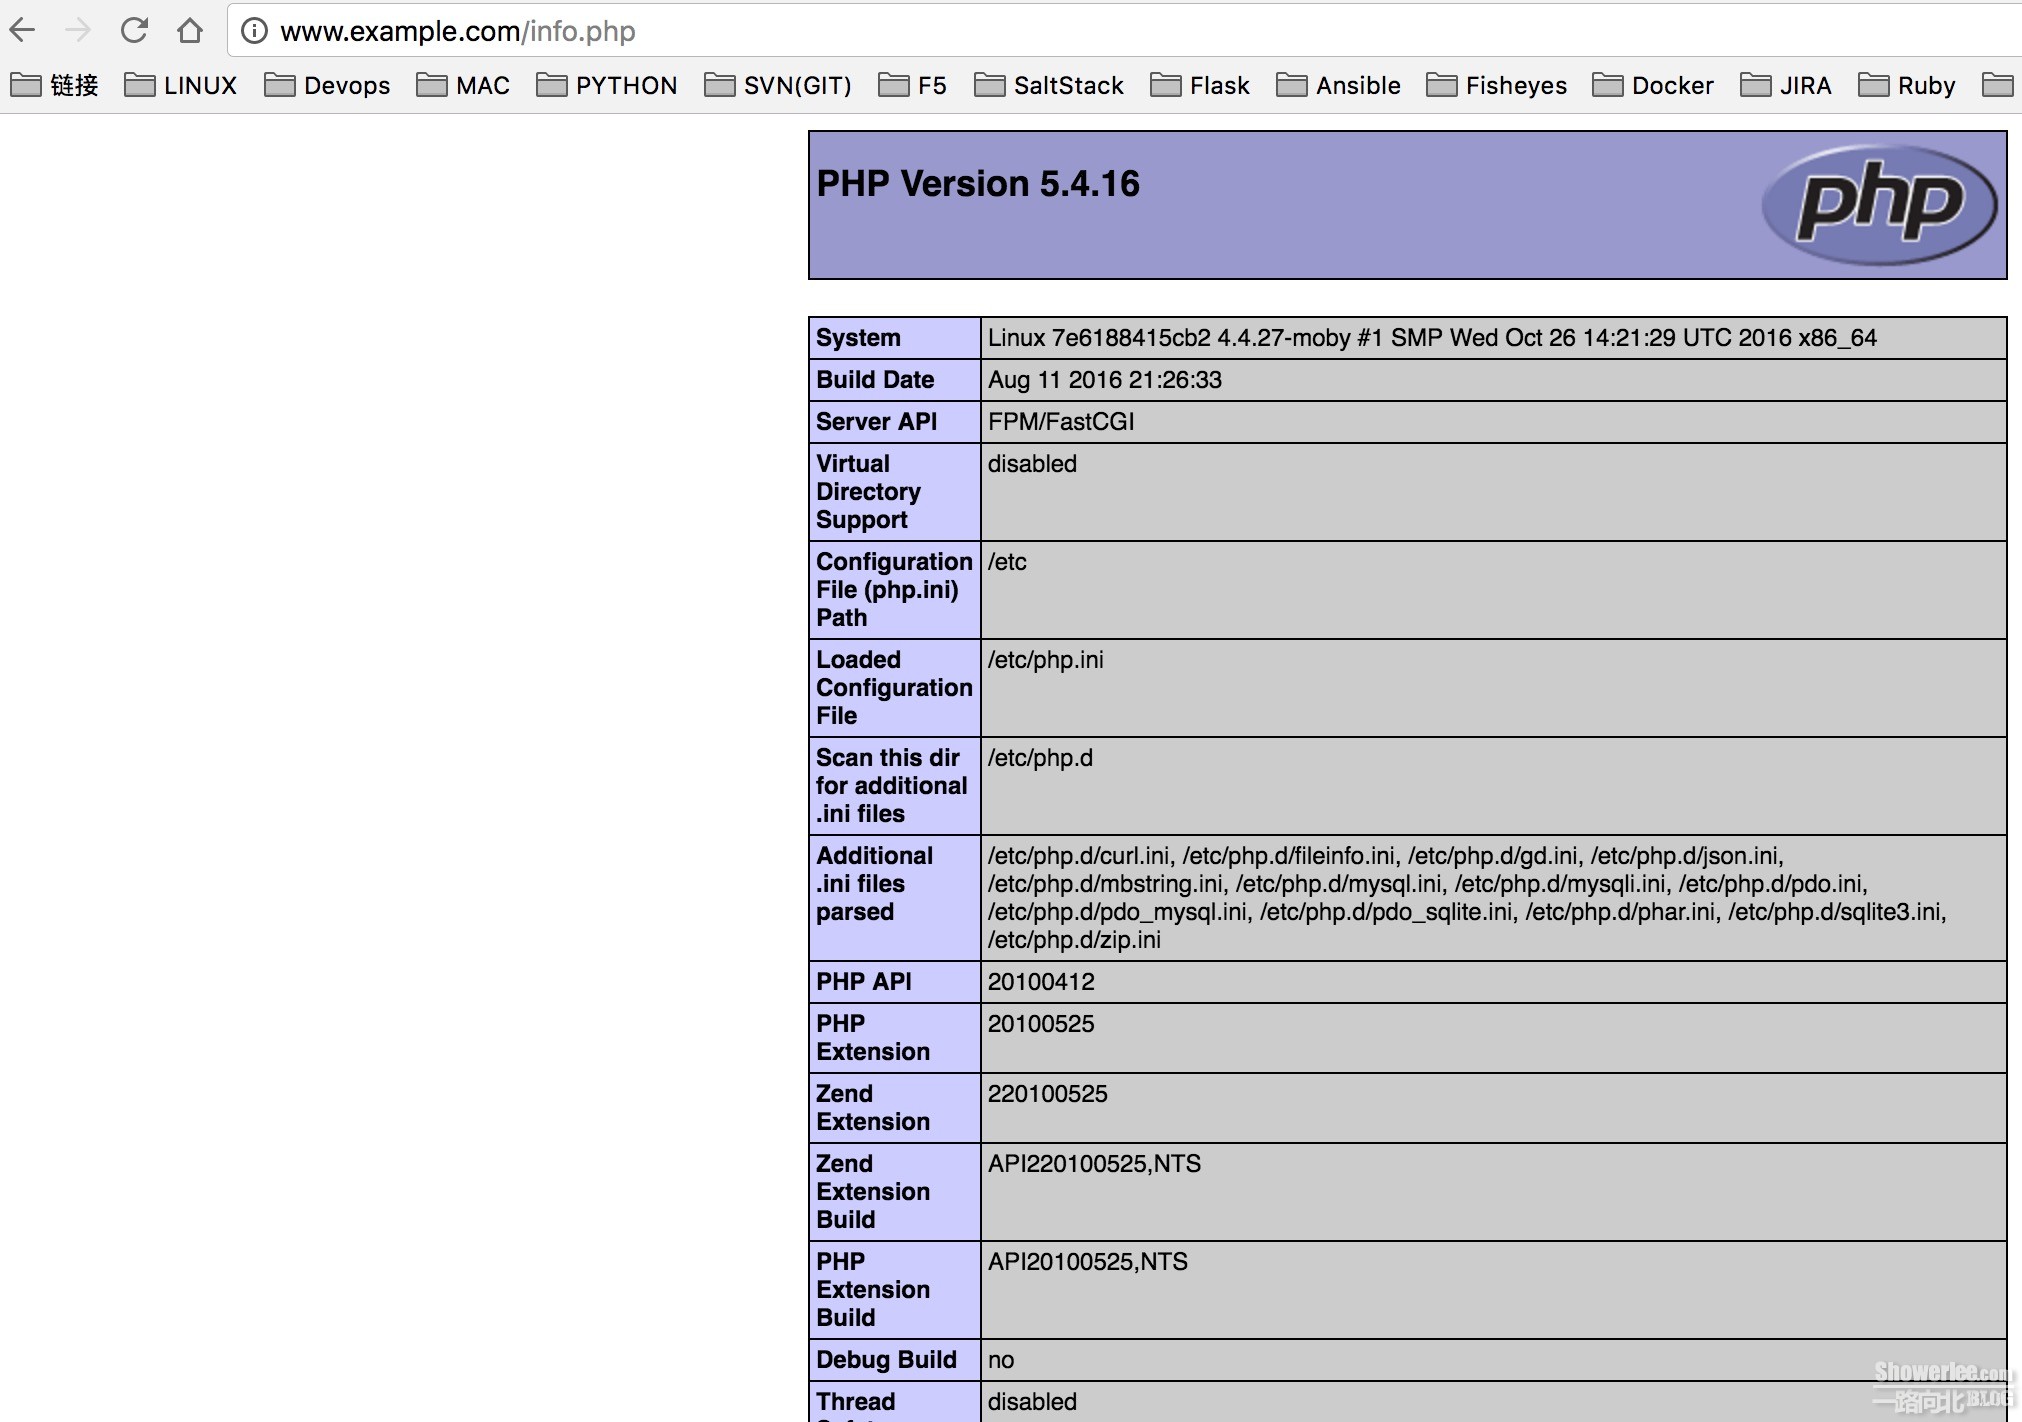
ansible/info.php
<?php
phpinfo();
?>
ansible/test-db-conn.php
<html><body><h1>The page to test Mariadb connection.</h1></body></html>
<?php
 $conn=mysql_connect('mariadb','root','123456');
 if ($conn)
   echo "<h2>Success...</h2>";
 else
   echo "<h2>Failure...</h2>";

?>
ansible/wp-config.php
<?php
/**
 * WordPress基础配置文件。
 *
 * 这个文件被安装程序用于自动生成wp-config.php配置文件,
 * 您可以不使用网站,您需要手动复制这个文件,
 * 并重命名为“wp-config.php”,然后填入相关信息。
 *
 * 本文件包含以下配置选项:
 *
 * * MySQL设置
 * * 密钥
 * * 数据库表名前缀
 * * ABSPATH
 *
 * @link https://codex.wordpress.org/zh-cn:%E7%BC%96%E8%BE%91_wp-config.php
 *
 * @package WordPress
 */

// ** MySQL 设置 - 具体信息来自您正在使用的主机 ** //
/** WordPress数据库的名称 */
define('DB_NAME', 'wordpress');

/** MySQL数据库用户名 */
define('DB_USER', 'root');

/** MySQL数据库密码 */
define('DB_PASSWORD', '123456');

/** MySQL主机 */
define('DB_HOST', 'mariadb');

/** 创建数据表时默认的文字编码 */
define('DB_CHARSET', 'utf8');

/** 数据库整理类型。如不确定请勿更改 */
define('DB_COLLATE', '');

/**#@+
 * 身份认证密钥与盐。
 *
 * 修改为任意独一无二的字串!
 * 或者直接访问{@link https://api.wordpress.org/secret-key/1.1/salt/
 * WordPress.org密钥生成服务}
 * 任何修改都会导致所有cookies失效,所有用户将必须重新登录。
 *
 * @since 2.6.0
 */
define('AUTH_KEY',         'put your unique phrase here');
define('SECURE_AUTH_KEY',  'put your unique phrase here');
define('LOGGED_IN_KEY',    'put your unique phrase here');
define('NONCE_KEY',        'put your unique phrase here');
define('AUTH_SALT',        'put your unique phrase here');
define('SECURE_AUTH_SALT', 'put your unique phrase here');
define('LOGGED_IN_SALT',   'put your unique phrase here');
define('NONCE_SALT',       'put your unique phrase here');

/**#@-*/

/**
 * WordPress数据表前缀。
 *
 * 如果您有在同一数据库内安装多个WordPress的需求,请为每个WordPress设置
 * 不同的数据表前缀。前缀名只能为数字、字母加下划线。
 */
$table_prefix  = 'wp_';

/**
 * 开发者专用:WordPress调试模式。
 *
 * 将这个值改为true,WordPress将显示所有用于开发的提示。
 * 强烈建议插件开发者在开发环境中启用WP_DEBUG。
 *
 * 要获取其他能用于调试的信息,请访问Codex。
 *
 * @link https://codex.wordpress.org/Debugging_in_WordPress
 */
define('WP_DEBUG', false);

/**
 * zh_CN本地化设置:启用ICP备案号显示
 *
 * 可在设置→常规中修改。
 * 如需禁用,请移除或注释掉本行。
 */
define('WP_ZH_CN_ICP_NUM', true);

/* 好了!请不要再继续编辑。请保存本文件。使用愉快! */

/** WordPress目录的绝对路径。 */
if ( !defined('ABSPATH') )
	define('ABSPATH', dirname(__FILE__) . '/');

/** 设置WordPress变量和包含文件。 */
require_once(ABSPATH . 'wp-settings.php');
ansible/www.conf
; Start a new pool named 'www'.
[www]

; The address on which to accept FastCGI requests.
; Valid syntaxes are:
;   'ip.add.re.ss:port'    - to listen on a TCP socket to a specific address on
;                            a specific port;
;   'port'                 - to listen on a TCP socket to all addresses on a
;                            specific port;
;   '/path/to/unix/socket' - to listen on a unix socket.
; Note: This value is mandatory.
listen = 0.0.0.0:9000

; Set listen(2) backlog. A value of '-1' means unlimited.
; Default Value: -1
;listen.backlog = -1

; List of ipv4 addresses of FastCGI clients which are allowed to connect.
; Equivalent to the FCGI_WEB_SERVER_ADDRS environment variable in the original
; PHP FCGI (5.2.2+). Makes sense only with a tcp listening socket. Each address
; must be separated by a comma. If this value is left blank, connections will be
; accepted from any ip address.
; Default Value: any
;listen.allowed_clients = any

; Set permissions for unix socket, if one is used. In Linux, read/write
; permissions must be set in order to allow connections from a web server. Many
; BSD-derived systems allow connections regardless of permissions.
; Default Values: user and group are set as the running user
;                 mode is set to 0666
listen.owner = nobody
listen.group = nobody
listen.mode = 0666

; Unix user/group of processes
; Note: The user is mandatory. If the group is not set, the default user's group
;       will be used.
; RPM: apache Choosed to be able to access some dir as httpd
user = nobody
; RPM: Keep a group allowed to write in log dir.
group = nobody

; Choose how the process manager will control the number of child processes.
; Possible Values:
;   static  - a fixed number (pm.max_children) of child processes;
;   dynamic - the number of child processes are set dynamically based on the
;             following directives:
;             pm.max_children      - the maximum number of children that can
;                                    be alive at the same time.
;             pm.start_servers     - the number of children created on startup.
;             pm.min_spare_servers - the minimum number of children in 'idle'
;                                    state (waiting to process). If the number
;                                    of 'idle' processes is less than this
;                                    number then some children will be created.
;             pm.max_spare_servers - the maximum number of children in 'idle'
;                                    state (waiting to process). If the number
;                                    of 'idle' processes is greater than this
;                                    number then some children will be killed.
; Note: This value is mandatory.
pm = dynamic

; The number of child processes to be created when pm is set to 'static' and the
; maximum number of child processes to be created when pm is set to 'dynamic'.
; This value sets the limit on the number of simultaneous requests that will be
; served. Equivalent to the ApacheMaxClients directive with mpm_prefork.
; Equivalent to the PHP_FCGI_CHILDREN environment variable in the original PHP
; CGI.
; Note: Used when pm is set to either 'static' or 'dynamic'
; Note: This value is mandatory.
pm.max_children = 5

; The number of child processes created on startup.
; Note: Used only when pm is set to 'dynamic'
; Default Value: min_spare_servers + (max_spare_servers - min_spare_servers) / 2
pm.start_servers = 2

; The desired minimum number of idle server processes.
; Note: Used only when pm is set to 'dynamic'
; Note: Mandatory when pm is set to 'dynamic'
pm.min_spare_servers = 1

; The desired maximum number of idle server processes.
; Note: Used only when pm is set to 'dynamic'
; Note: Mandatory when pm is set to 'dynamic'
pm.max_spare_servers = 3

; The number of requests each child process should execute before respawning.
; This can be useful to work around memory leaks in 3rd party libraries. For
; endless request processing specify '0'. Equivalent to PHP_FCGI_MAX_REQUESTS.
; Default Value: 0
;pm.max_requests = 500

; The URI to view the FPM status page. If this value is not set, no URI will be
; recognized as a status page. By default, the status page shows the following
; information:
;   accepted conn    - the number of request accepted by the pool;
;   pool             - the name of the pool;
;   process manager  - static or dynamic;
;   idle processes   - the number of idle processes;
;   active processes - the number of active processes;
;   total processes  - the number of idle + active processes.
; The values of 'idle processes', 'active processes' and 'total processes' are
; updated each second. The value of 'accepted conn' is updated in real time.
; Example output:
;   accepted conn:   12073
;   pool:             www
;   process manager:  static
;   idle processes:   35
;   active processes: 65
;   total processes:  100
; By default the status page output is formatted as text/plain. Passing either
; 'html' or 'json' as a query string will return the corresponding output
; syntax. Example:
;   http://www.foo.bar/status
;   http://www.foo.bar/status?json
;   http://www.foo.bar/status?html
; Note: The value must start with a leading slash (/). The value can be
;       anything, but it may not be a good idea to use the .php extension or it
;       may conflict with a real PHP file.
; Default Value: not set
;pm.status_path = /status

; The ping URI to call the monitoring page of FPM. If this value is not set, no
; URI will be recognized as a ping page. This could be used to test from outside
; that FPM is alive and responding, or to
; - create a graph of FPM availability (rrd or such);
; - remove a server from a group if it is not responding (load balancing);
; - trigger alerts for the operating team (24/7).
; Note: The value must start with a leading slash (/). The value can be
;       anything, but it may not be a good idea to use the .php extension or it
;       may conflict with a real PHP file.
; Default Value: not set
;ping.path = /ping

; This directive may be used to customize the response of a ping request. The
; response is formatted as text/plain with a 200 response code.
; Default Value: pong
;ping.response = pong

; The timeout for serving a single request after which the worker process will
; be killed. This option should be used when the 'max_execution_time' ini option
; does not stop script execution for some reason. A value of '0' means 'off'.
; Available units: s(econds)(default), m(inutes), h(ours), or d(ays)
; Default Value: 0
;request_terminate_timeout = 0

; The timeout for serving a single request after which a PHP backtrace will be
; dumped to the 'slowlog' file. A value of '0s' means 'off'.
; Available units: s(econds)(default), m(inutes), h(ours), or d(ays)
; Default Value: 0
;request_slowlog_timeout = 0

; The log file for slow requests
; Default Value: not set
; Note: slowlog is mandatory if request_slowlog_timeout is set
slowlog = /var/log/php-fpm/www-slow.log

; Set open file descriptor rlimit.
; Default Value: system defined value
;rlimit_files = 1024

; Set max core size rlimit.
; Possible Values: 'unlimited' or an integer greater or equal to 0
; Default Value: system defined value
;rlimit_core = 0

; Chroot to this directory at the start. This value must be defined as an
; absolute path. When this value is not set, chroot is not used.
; Note: chrooting is a great security feature and should be used whenever
;       possible. However, all PHP paths will be relative to the chroot
;       (error_log, sessions.save_path, ...).
; Default Value: not set
;chroot =

; Chdir to this directory at the start. This value must be an absolute path.
; Default Value: current directory or / when chroot
;chdir = /var/www

; Redirect worker stdout and stderr into main error log. If not set, stdout and
; stderr will be redirected to /dev/null according to FastCGI specs.
; Default Value: no
;catch_workers_output = yes

; Limits the extensions of the main script FPM will allow to parse. This can
; prevent configuration mistakes on the web server side. You should only limit
; FPM to .php extensions to prevent malicious users to use other extensions to
; exectute php code.
; Note: set an empty value to allow all extensions.
; Default Value: .php
;security.limit_extensions = .php .php3 .php4 .php5

; Pass environment variables like LD_LIBRARY_PATH. All $VARIABLEs are taken from
; the current environment.
; Default Value: clean env
;env[HOSTNAME] = $HOSTNAME
;env[PATH] = /usr/local/bin:/usr/bin:/bin
;env[TMP] = /tmp
;env[TMPDIR] = /tmp
;env[TEMP] = /tmp

; Additional php.ini defines, specific to this pool of workers. These settings
; overwrite the values previously defined in the php.ini. The directives are the
; same as the PHP SAPI:
;   php_value/php_flag             - you can set classic ini defines which can
;                                    be overwritten from PHP call 'ini_set'.
;   php_admin_value/php_admin_flag - these directives won't be overwritten by
;                                     PHP call 'ini_set'
; For php_*flag, valid values are on, off, 1, 0, true, false, yes or no.

; Defining 'extension' will load the corresponding shared extension from
; extension_dir. Defining 'disable_functions' or 'disable_classes' will not
; overwrite previously defined php.ini values, but will append the new value
; instead.

; Default Value: nothing is defined by default except the values in php.ini and
;                specified at startup with the -d argument
;php_admin_value[sendmail_path] = /usr/sbin/sendmail -t -i -f www@my.domain.com
;php_flag[display_errors] = off
php_admin_value[error_log] = /var/log/php-fpm/www-error.log
php_admin_flag[log_errors] = on
;php_admin_value[memory_limit] = 128M

; Set session path to a directory owned by process user
php_value[session.save_handler] = files
php_value[session.save_path] = /var/lib/php/session
run.sh
#/bin/bash

IMAGE="leon/php"
Container="php"
Link="mariadb"

docker build -t ${IMAGE} .

docker run -d -p 9000:9000 --name ${Container} --link ${Link}:${Link} ${IMAGE}
这里去创建PHP并启动镜像,需要提到这里的link就是文章开头说到的需要与DB进行安全传输,并在php容器内创建一个DB的host记录。
我们可以使用这个命令去进入容器,查看该记录。
# docker exec -it php bash
[root@7e6188415cb2 ansible]# cat /etc/hosts
127.0.0.1      	localhost
::1    	localhost ip6-localhost ip6-loopback
fe00::0	ip6-localnet
ff00::0	ip6-mcastprefix
ff02::1	ip6-allnodes
ff02::2	ip6-allrouters
172.17.0.2     mariadb 29ae9593fbfc
172.17.0.3     7e6188415cb2
Tip: 这里可以看到mariadb的内网ip为172.17.0.2, php-fpm的为172.17.0.3, 我们MAC本机作为Docker主机与容器间会进行DNAT通信,容器因为在同一内网,可自由通信,前提是需要在创建和启动镜像前打开相应服务端口。
Nginx container
这里最终我们会利用Nginx作为一个反向代理,配置www.example.com去访问我们的PHP容器下的Wordpress页面.
Dockerfile
FROM ansible/centos7-ansible/epel:stable

ADD ansible /data/ansible

WORKDIR /data/ansible

RUN ansible-playbook nginx-container.yml -c local

VOLUME ["/data/app"]

# CMD ["nginx", "-g", "daemon off;"]
ENTRYPOINT [ "/usr/sbin/nginx" ]

EXPOSE 80
EXPOSE 443
这里基本与PHP的容器配置类似,执行playbook,共享网站目录,启动nginx服务并打开80,443端口。
ansible/nginx-container.yml
- name: Create Nginx container
  hosts: local
  vars:
    global_conf_path: /etc/nginx/nginx.conf
    server_conf_path: /etc/nginx/conf.d/default.conf
  tasks:
  - name: Install epel-release package
    yum: name=epel-release state=latest

  - name: Install required packages
    yum: name={{ item }} state=latest
    with_items:
      - net-tools
      - lsof
      - nmap
      - nginx

  - name: Copy nginx global conf
    copy: src=nginx.conf dest={{ global_conf_path }} mode=0644

  - name: Copy nginx server conf
    copy: src=default.conf dest={{ server_conf_path }} mode=0644
这里安装nginx,并将配置文件复制到对应nginx目录.
ansible/defalut.conf
# The default server
#

upstream backend {
    server php:9000;
}

server {
    listen 80;
    server_name http://www.example.com;
    root /data/app;
    index index.php index.html index.htm;

    location / {
          try_files $uri $uri/ =404;
    }

    location ~ \.php$ {
        fastcgi_pass backend;
        fastcgi_index index.php;
        include fastcgi.conf;
    }

}
ansible/nginx.conf
# For more information on configuration, see:
#   * Official English Documentation: http://nginx.org/en/docs/
#   * Official Russian Documentation: http://nginx.org/ru/docs/

user nobody;
worker_processes 1;
error_log /var/log/nginx/error.log;
pid /run/nginx.pid;
daemon off;

# Load dynamic modules. See /usr/share/nginx/README.dynamic.
include /usr/share/nginx/modules/*.conf;

events {
    worker_connections 768;
}

http {
    log_format  main  '$remote_addr - $remote_user [$time_local] "$request" '
                      '$status $body_bytes_sent "$http_referer" '
                      '"$http_user_agent" "$http_x_forwarded_for"';

    access_log  /var/log/nginx/access.log  main;

    sendfile            on;
    tcp_nopush          on;
    tcp_nodelay         on;
    keepalive_timeout   65;
    types_hash_max_size 2048;

    include             /etc/nginx/mime.types;
    default_type        application/octet-stream;

    # Load modular configuration files from the /etc/nginx/conf.d directory.
    # See http://nginx.org/en/docs/ngx_core_module.html#include
    # for more information.
    include /etc/nginx/conf.d/*.conf;

    server {
        listen       80 default_server;
        listen       [::]:80 default_server;
        server_name  _;
        root         /usr/share/nginx/html;

        # Load configuration files for the default server block.
        include /etc/nginx/default.d/*.conf;

        location / {
        }

        error_page 404 /404.html;
            location = /40x.html {
        }

        error_page 500 502 503 504 /50x.html;
            location = /50x.html {
        }
    }

# Settings for a TLS enabled server.
#
#    server {
#        listen       443 ssl http2 default_server;
#        listen       [::]:443 ssl http2 default_server;
#        server_name  _;
#        root         /usr/share/nginx/html;
#
#        ssl_certificate "/etc/pki/nginx/server.crt";
#        ssl_certificate_key "/etc/pki/nginx/private/server.key";
#        ssl_session_cache shared:SSL:1m;
#        ssl_session_timeout  10m;
#        ssl_ciphers HIGH:!aNULL:!MD5;
#        ssl_prefer_server_ciphers on;
#
#        # Load configuration files for the default server block.
#        include /etc/nginx/default.d/*.conf;
#
#        location / {
#        }
#
#        error_page 404 /404.html;
#            location = /40x.html {
#        }
#
#        error_page 500 502 503 504 /50x.html;
#            location = /50x.html {
#        }
#    }

}
run.sh
#/bin/bash

IMAGE="leon/nginx"
Container="nginx"
Link="php"
Volume="php"

docker build -t ${IMAGE} .

docker run -d -p 80:80 -p 443:443 --name ${Container} --link ${Link}:${Link} --volumes-from ${Volume} ${IMAGE}
这里需要注意的是我们添加了一个--volumes-from参数用来调用PHP share出来的网站目录。
这里我们分别执行3个目录下的执行脚本(run.sh)后,效果如下:
# docker ps
CONTAINER ID        IMAGE               COMMAND                  CREATED             STATUS              PORTS                                      NAMES
7e6188415cb2        leon/php            "/usr/sbin/php-fpm -F"   2 hours ago         Up About an hour    0.0.0.0:9000->9000/tcp                     php
29ae9593fbfc        leon/mariadb        "./mariadb.sh"           2 hours ago         Up About an hour    0.0.0.0:3306->3306/tcp                     mariadb
d07bb4aea5c1        leon/nginx          "/usr/sbin/nginx"        3 days ago          Up 4 hours          0.0.0.0:80->80/tcp, 0.0.0.0:443->443/tcp   nginx
# docker images
REPOSITORY                     TAG                 IMAGE ID            CREATED             SIZE
leon/php                       latest              f243f43c99a2        3 hours ago         883 MB
leon/mariadb                   latest              7046c76b434a        3 hours ago         1.694 GB
leon/nginx                     latest              d588d0a73eee        7 days ago          737.6 MB
ansible/centos7-ansible        stable              5108f665e079        3 weeks ago         433.3 MB
到这里我们就成功创建并启动了我们Wordpress所需要的三个基础服务。
我们可以利用Docker start "容器名"或者Docker stop "容器名" 去启动或者关闭这个包含具体服务的容器,可以作为我们在Docker服务器下重启服务的命令。
如果需要进入容器进行调测,我们也可以使用Docker exec -it "容器名" bash
测试结果
我们给MAC主机添加一个host记录
# cat /etc/hosts
127.0.0.1 http://www.example.com
然后使用PHP测试文件分别测试PHP是否部署成功以及PHP与MariaDB是否联通
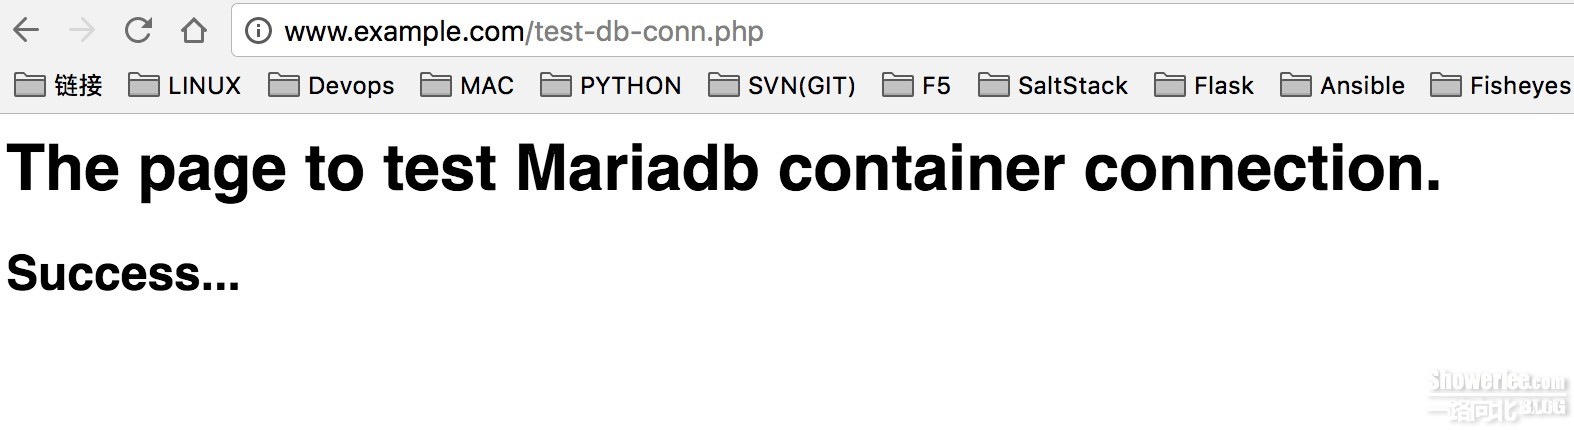
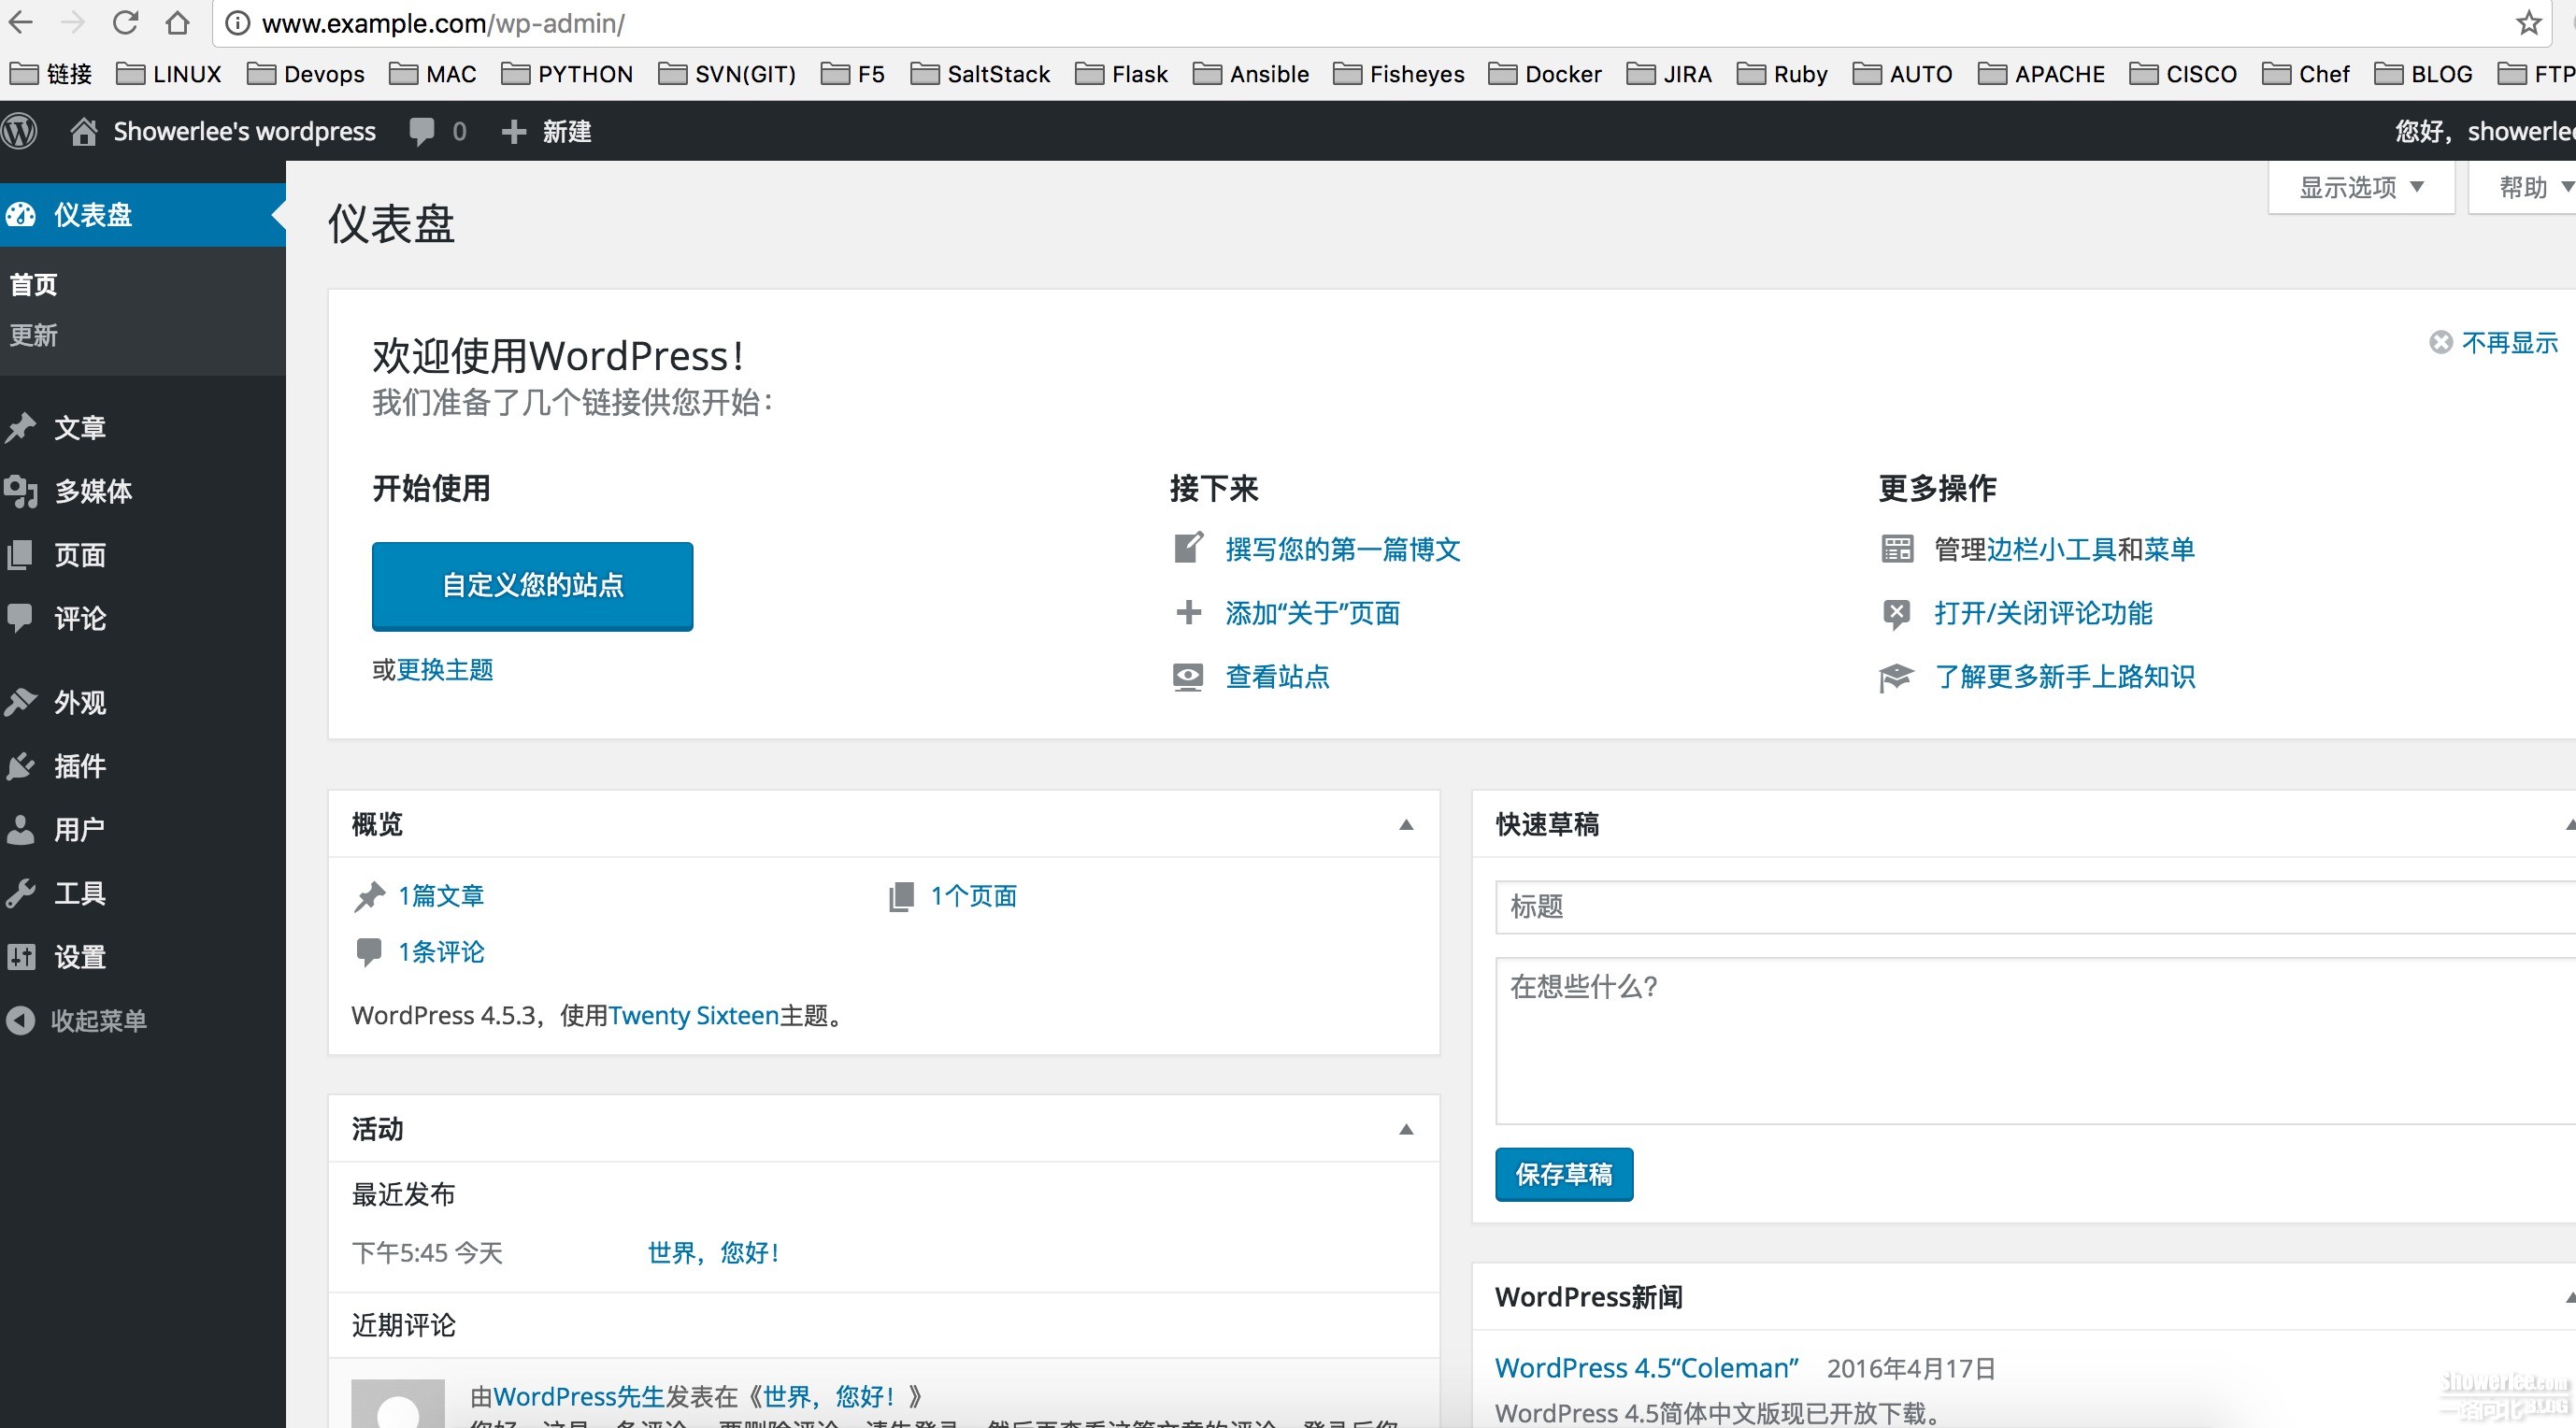
最终我们访问www.example.com查看wordpress是否部署成功。

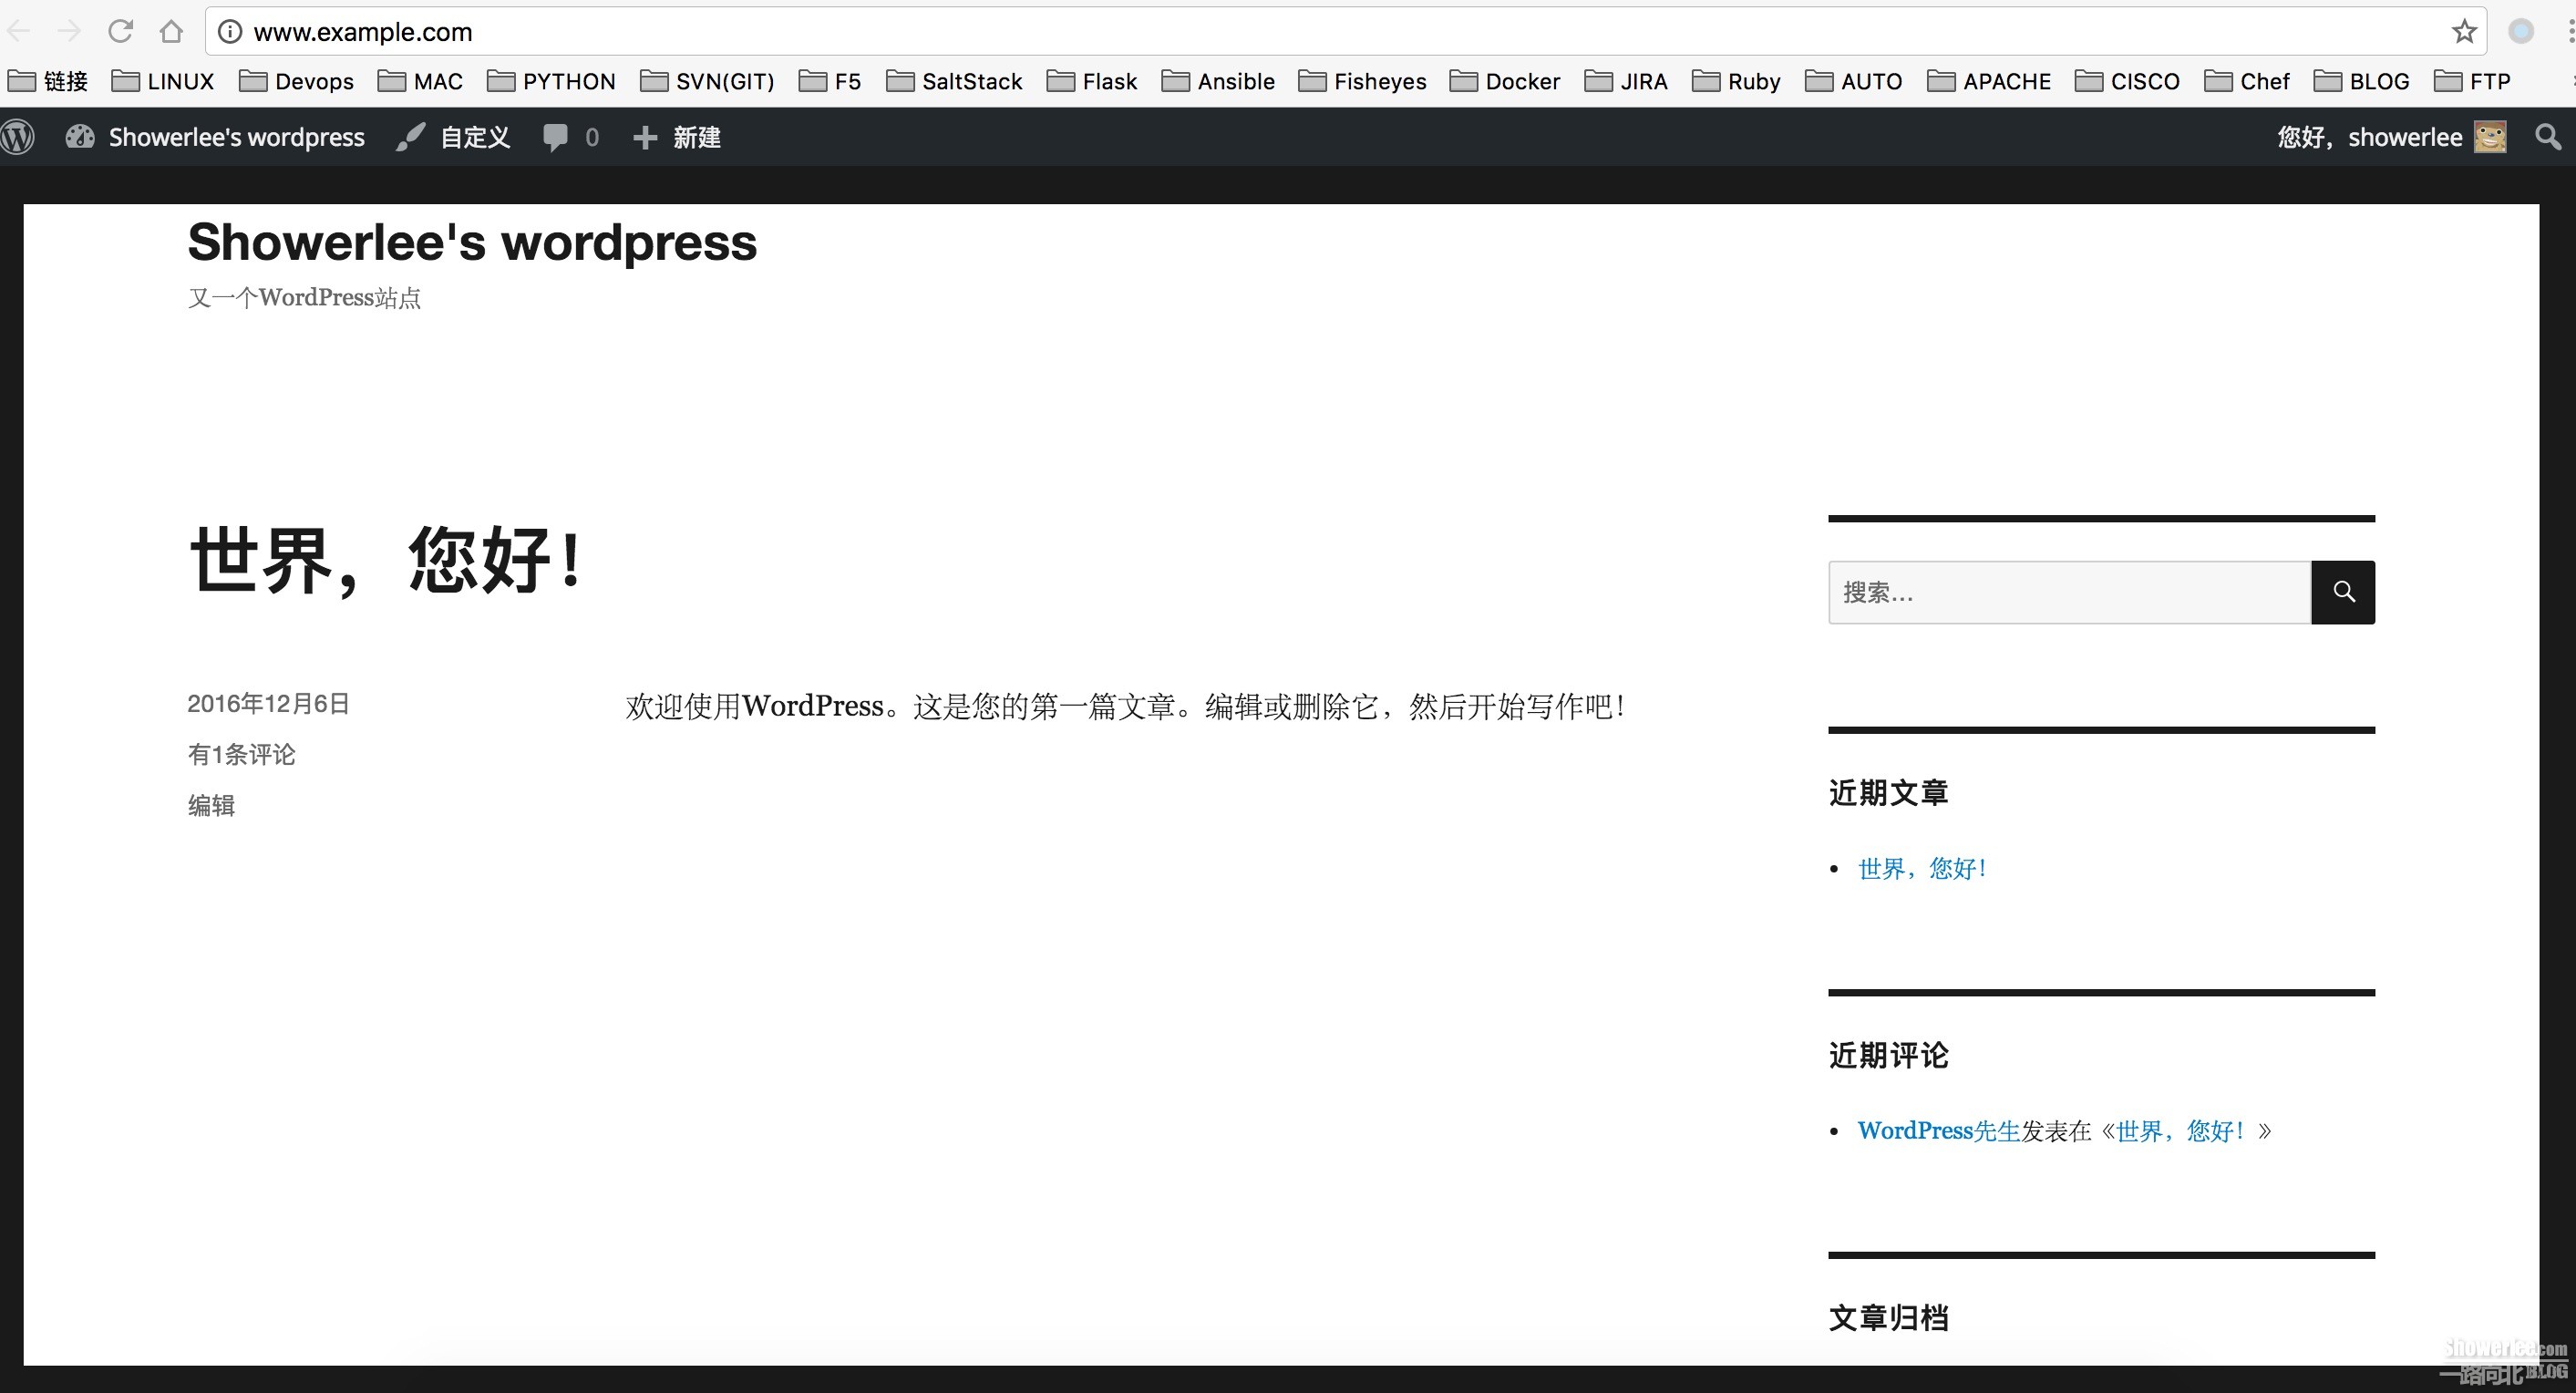
至此使用Docker+Ansible部署Wordpress大功告成。。。
本文链接:http://www.showerlee.com/archives/1938
4条大神的评论


部署脚本clone不了啊

开放一下呗
@richardlee 你试试:
git clone https://showerlee@git.showerlee.com/showerlee/ansible-docker-wp.git
应该是开放的