
Centos6.3下rsync+inotify安装配置笔记
inotify是一种强大的,细粒度的,异步文件系统时间监控机制,它可以替代crond实现与rsync的触发式文件同步,从而监控文件系统中添加,删除,修改,移动等细粒事件,从LINUX 2.6.13起,就已加入了对inotify的支持,所以我们只需要安装一个第三方软件inotify-tools即可管理此服务。
之前利用的rsync+crond来触发实现同步的瓶颈在于,rsync在同步数据时,需要先扫描所有文件后进行比对,而后进行差异传输,如果文件数量级别很大而且变化会很快,扫描所有文件会非常耗时,而且会存在漏同步的问题,造成效率低下。
而rsync+inotify则会弥补前者先扫描后同步的效率问题,采用系统级别监控各种变化,当文件发生任何变化,就会触发rsync同步,解决效率与实时性问题。
LINUX操作系统: centOS6.3 64bit
rsync: 系统自带
inotify-tools: inotify-tools-master
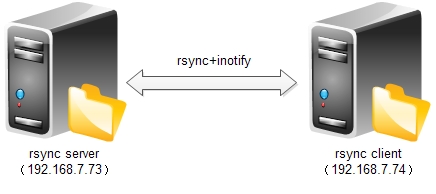
www1(rsync server):192.168.7.73
www2(rsync client):192.168.7.74
拓扑图:
(server)表示仅服务端配置
(client)表示仅客户端配置
(server,client)表示客户端与服务端都需配置
环境搭建:(server,client)
1.关闭iptables和SELINUX
# service iptables stop
# setenforce 0
# vi /etc/sysconfig/selinux
---------------
SELINUX=disabled
---------------
判断LINUX系统内核是否达到2.6.13以上:
# uname -a
-------------
Linux www1.example.com 2.6.32-279.el6.x86_64 #1 SMP Fri Jun 22 12:19:21 UTC 2012 x86_64 x86_64 x86_64 GNU/Linux
-------------
查看inotify目录是否存在:
# ls -lsart /proc/sys/fs/inotify/
------------------
总用量 0
0 dr-xr-xr-x 0 root root 0 6月 4 14:04 ..
0 dr-xr-xr-x 0 root root 0 6月 4 17:35 .
0 -rw-r--r-- 1 root root 0 6月 4 17:35 max_user_watches
0 -rw-r--r-- 1 root root 0 6月 4 17:35 max_user_instances
0 -rw-r--r-- 1 root root 0 6月 4 17:35 max_queued_events
------------------
若返回以上内容,则系统支持inotify.
一.安装rsync:(server,client)
传送门:http://www.showerlee.com/archives/419
配置:(server)
# vi /etc/rsyncd.conf
--------------------
uid = root
gid = root
use chroot = no
max connections = 10
strict modes = yes
port = 873
address = 192.168.7.73
[test]
path = /test
comment = mirror for test
ignore errors
read only = no
list = no
auth users = user
secrets file = /etc/rsync.pas
hosts allow = *
# hosts deny = 0.0.0.0/0
pid file = /var/run/rsyncd.pid
lock file = /var/run/rsync.lock
log file = /var/log/rsyncd.log
--------------------
启动rsync
# rsync --daemon --config=/etc/rsyncd.conf
重启xinetd使其配置生效:
# /etc/init.d/xinetd restart
二.安装inotify-tools:(server,client)
可以到https://github.com/rvoicilas/inotify-tools/下载zip包,然后传到系统进行编译安装:
# unzip inotify-tools-master.zip
# cd inotify-tools-master
# ./autogen.sh
# ./configure --prefix=/usr/local/inotify
# make && make install
配置client端的inotify:(client)
# vi /etc/rc.d/inotify.sh
该脚本在做客户端目录下文件若发生变化,则向服务端做同步上传操作,也就是保持客户端目录文件发生变化,服务端也相应改变。
------------------
#!/bin/bash
src=/test
des=test
ip=192.168.7.73
/usr/local/inotify/bin/inotifywait -mrq --timefmt '%d/%m/%y/%H:%M' --format '%T%w%f' -e modify,delete,create,attrib $src | while read file
do
rsync -vzrtopg --delete --progress $src user@$ip::$des --password-file=/etc/rsync.pas &&
echo "$src has been resynced"
done
------------------
赋予执行权限
# chmod +x /etc/rc.d/inotify.sh
执行脚本并做开机启动:
# /etc/rc.d/inotify.sh
# echo "/etc/rc.d/inotify.sh" >> /etc/rc.local
注:这个脚本的作用是通过inotify监控文件目录的变化,进而触发rsync进行同步操作,由于这是通过内核完成的主动式触发操作,所以比rsync遍历整个目录的扫描方式效率要高很多。
验证:
在客户端创建5个文件,到服务端查看文件是否实时同步?
(client)
# cd /test
# touch 1 2 3 4 5
(server)
# cd /test
# ls
-------------
1 2 3 4 5
-------------
验证成功,client端的目录发生变化会实时同步到server端,类似一个网络raid-1
总结:
rsync+inotify比较适用于轻量级文件即时同步,如果量大建议还是使用共享存储方法解决。
参考:酒哥的构建高可用LINUX服务器(第2版)
本文链接:http://www.showerlee.com/archives/678


还没有评论,快来抢沙发!